
I’ve recently been spending some time “cleaning up” our VMWare infrastructure and making it more functional – both for demos and for internal lab use. To that end, I’ve been trying to automate/simplify as many things as possible. One task that I’d been wanting to simplify is snapshot creation/deletion of multiple VMs at once since this is something we do all the time. Imagine you have a set of VMs that are used for a single lab instance of a product. Before you make any major changes – for example patching or upgrading the product – you want to create a clean snapshot so that you can revert if something goes wrong. Unfortunately, this is something you can only do one VM-at-a-time in a vanilla-vCenter environment. However, it’s dead simple using Powershell and PowerCLI!
Enable Remotesigning in Powershell
In order to avoid popup warnings and errors later, you’ll want to enable remote signing in PowerShell. Open a PowerShell command window and type the following: “Set-ExecutionPolicy RemoteSigned“. I don’t really want to go into why this needs to be done, but if you want more info just type “Get-Help About_Signing | More” in PowerShell (or use The Google).
Download and Test PowerCLI
I’m using the latest version of PowerCLI – 5.5. After installation, go ahead and run the “VMWare vSphere PowerCLI” program and type the following two commands:
- Connect-VIServer –Server <vSphere Server Name>. I’m assuming that your using Windows authentication – if not, then you’ll need to supply a username/password.
- Get-VM
Ideally, you should see a list of all the VMs in your vCenter system.
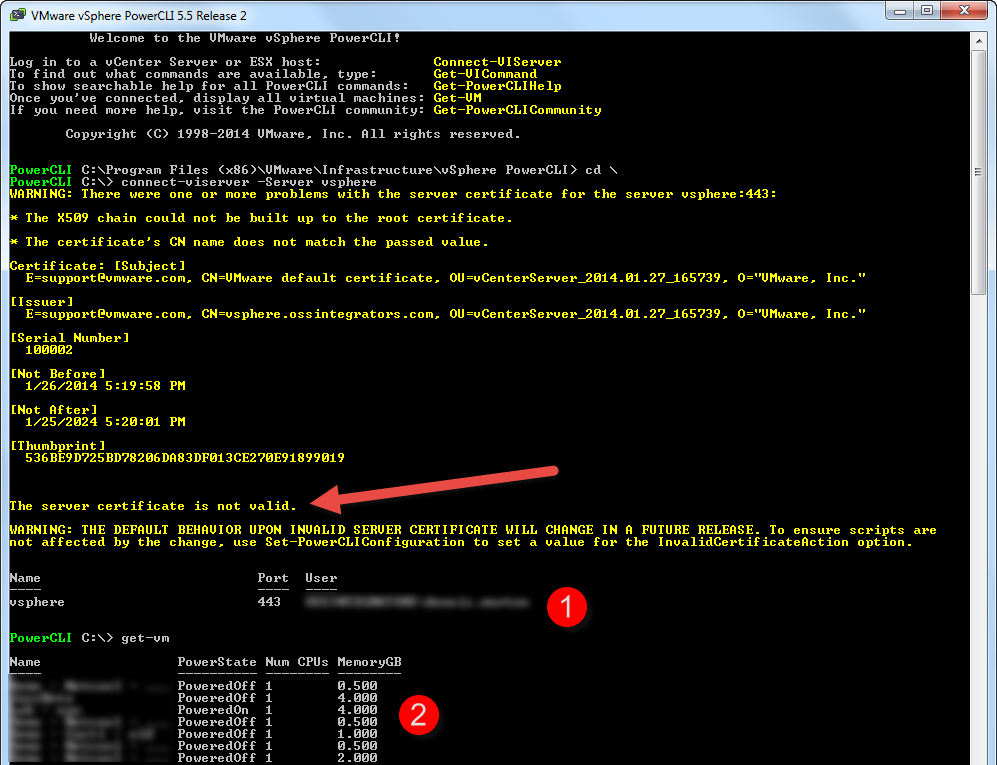
If you want to get rid of that annoying “certificate is not valid” message, then simply run the command “Set-PowerCLIConfiguration -InvalidCertificateAction Ignore“.
Powershell IDEs
Now that you have both PowerShell and PowerCLI working, it’s time to test out an IDE. You’ll want an IDE for a number of reasons: syntax highlighting, in-line documentation, and debugging are just a few. While there are quite a few options, let’s just look at two free ones: PowerShell ISE from Microsoft and PowerGUI from Dell.
PowerShell ISE
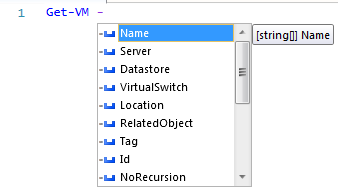
The latest PowerShell ISE is included in the Windows Management Framework 4.0, available here. Once installed, type “Add-PSSnapin Vmware*” in the PowerShell window to load the PowerCLI components. Doing so allows all the IDE enhancements like IntelliSense to work (see below).
PowerGUI
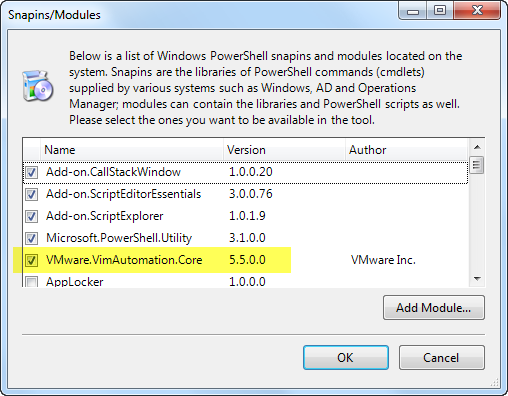
Another free IDE option is PowerGUI, available here. After install, run it and choose “File->PowerShell Libraries” and check the VMWare.VimAutomation.Core module to enable Intellisense and inline help for PowerCLI:
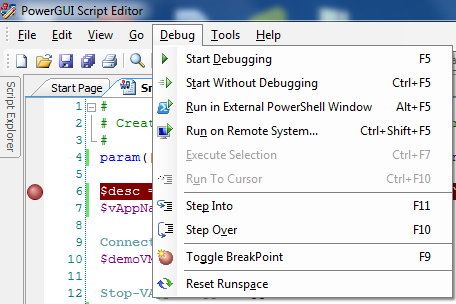
IMO, PowerGUI does many things better than PowerShell ISE:
- I like the debugger better – it feels closer to the Visual Studio “experience”.
- The Variables window is nice – it gives you quick access to all variables and their values in a script. It mostly eliminates having to step through your script to see what values a variable contains.
- I like the inline help implementation – it makes learning/exploring much easier (just hover over a cmdlet for help)!

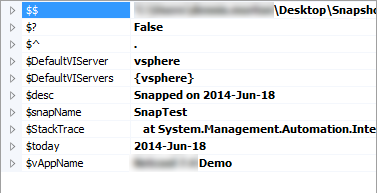
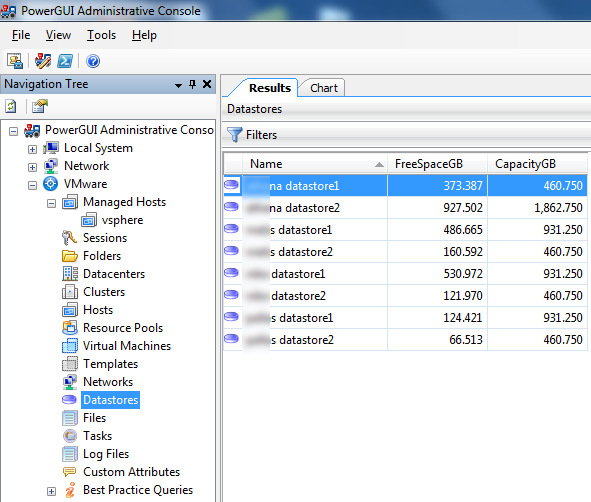
- It includes the PowerGUI Admin Console – a separate program that makes it easy to explore the namespaces and values of a PowerShell SnapIns.
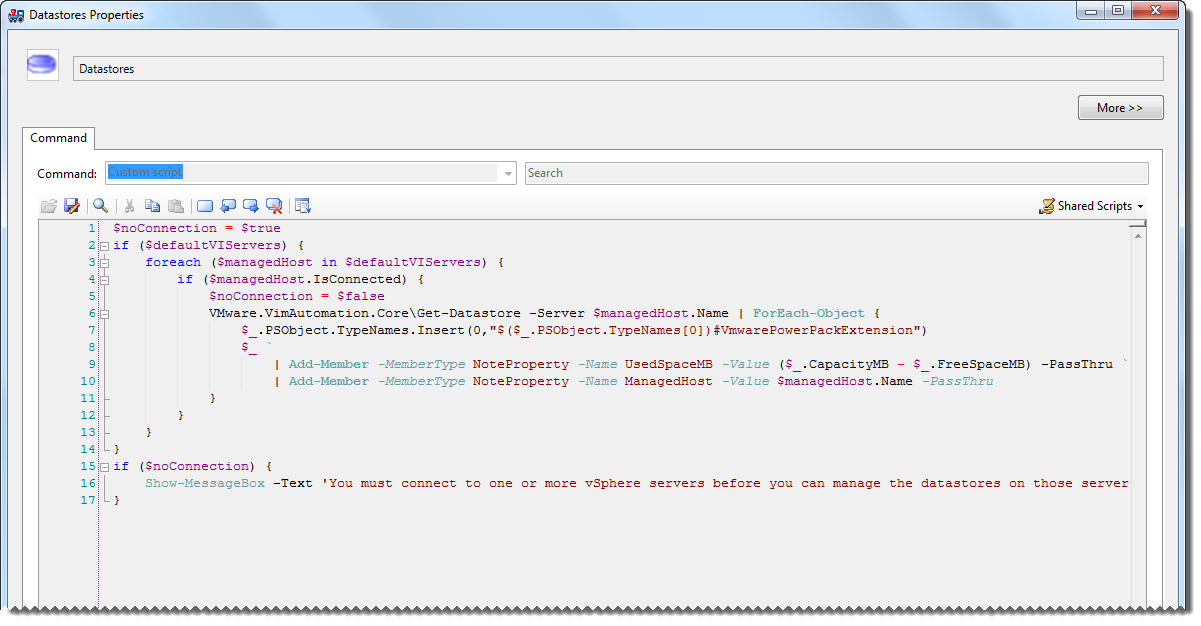
A nifty feature of the Admin console is that right-clicking on any item in the tree and selecting “Properties” brings up a window showing the PowerShell script used to generate the output! This can be a real time saver.
Simple Snapshot Script
Now we’re ready to write a script that will allow us to snapshot multiple VMs at once, in this case all members of a vApp. The high-level flow we need is:
- Prompt for a snapshot name
- Connect to the vCenter Server
- Stop the vApp
- Get all the VMs in the vApp and snapshot them
- Start the vApp
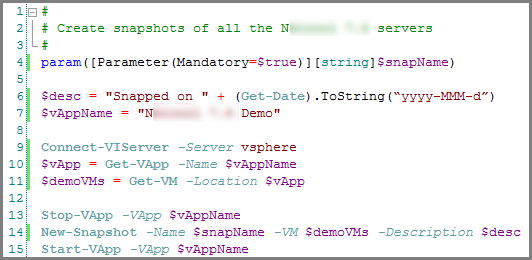
The completed script looks like this:
Explanation:
- Line 4: this is the “Powershell Way” for getting user input – Parameters. Using Parameters allows the script to be called from other scripts. See here for a nice overview.
- Line 10: gets the vApp object that we want to snap.
- Line 11: add all the VMs in the vApp to a variable so we can actually snapshot them later.
- Lines 13-15: do the actual work!
Conclusion
I hope this little walkthrough was useful – I know I will be using PowerShell and PowerCLI a lot more in the future (I only wish I had looked into it sooner!).