
This post aims to solve the most common issue that I’ve faced with our (admittedly not too large) ESXi infrastructure – how to add more drive space to a CentOS VM that only has one virtual HD. Strangely enough, this is more obtuse than it really should be!
Note: this would be normally be completely unnecessary if you allocate enough space when creating the VM, but sometimes that’s just not an option.
Warning: you cannot expand the disk of a VM with snapshots!
In general, you have two options for adding drive space:
- Make the existing VM HD larger.
- Add another VM HD.
I’ll cover option one here, since this makes things somewhat easier because you’re not adding additional virtual hardware.
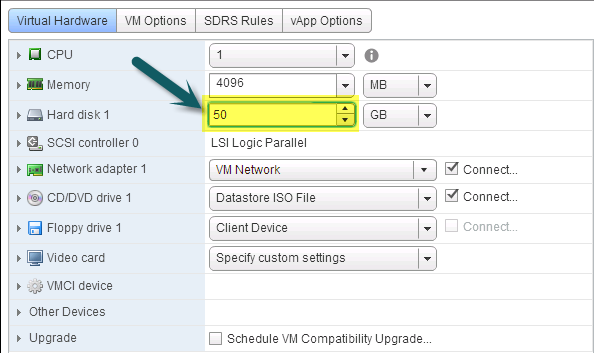
First, of course, you must increase the disk size in VMWare (shutdown the VM first):
Then, start the VM, login as root and run the following command to verify that the OS sees the additional, un-partitioned space. Note the difference between the two red underlined sections – this is what we want.

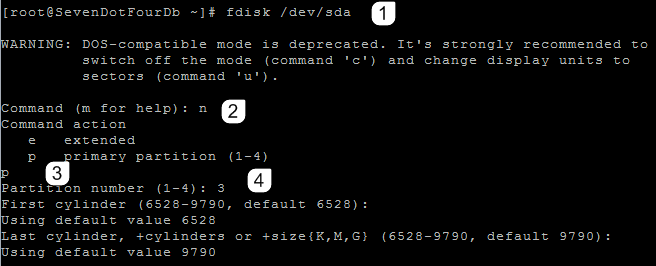
Now, create a new partition that covers all the free space. This is a multi-step process:
- Create a new primary partition on an available partition number (3 in this case).
- Change the partition type to “Linux LVM” (8e).
- Write the new partition table.
- Reboot to “enable” the new disk layout (while there are options to do this dynamically, we’ll keep it simple).
Part 2 :

Notice that I used the “p” command to print the new partition table – see how the red underlines (existing) partition has the correct type but “/dev/sda3” does not? Step #2 corrects that problem.
Iinitialize the new partition for use by the Logical Volume Manager:

Now, let’s add the new LVM-enabled partition into the existing data volume. Use the “pvs” command to find the volume name:

Oops! Of course there’s no space on the device – that’s why we’re expanding it! Unfortunately, this means that you must free up some space (a few megabytes will do – delete some log files) and then re-run the command:
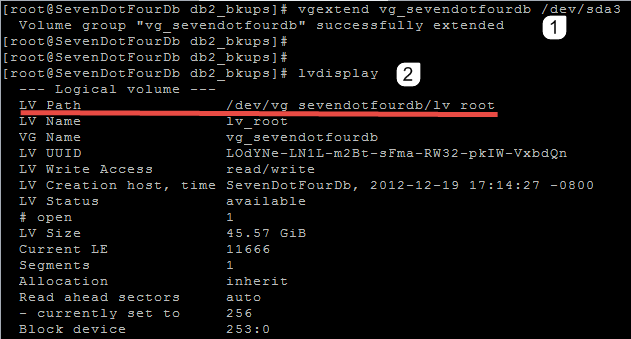
Make note of the “LV Path” (underlined in red), because we are finally ready to actually make the drive larger! One last command:

The “-r” option is crucial since it automatically runs the “resize2fs” command – if you forget this option than you’ll need to run the command manually.
We now have successfully added additional disk space!

The following links provide some useful additional information: